Posts tagged "Home Depot"

8 Results Found


Don't worry, I didn't get rid of the truck.


My home is roughly 16' x 6', or 96 ft2. That makes it a little smaller than your average bedroom. In other words, it's in my best interest to optimize how I use my limited space. Two years ago, I talked about consolidating and defragmenting how I laid out my room. The diagram I used looked like this:

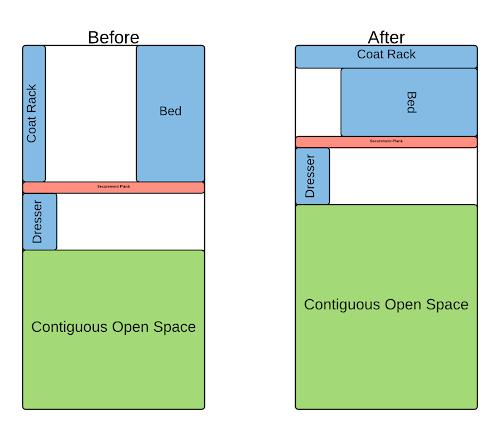
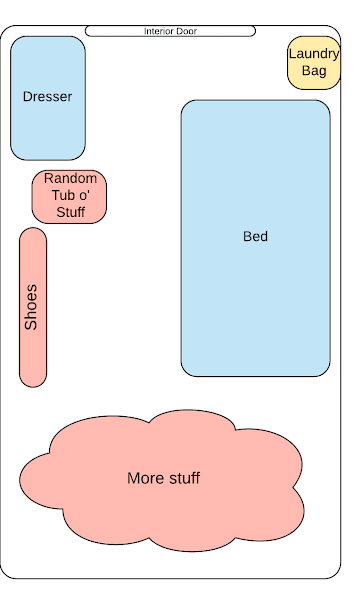
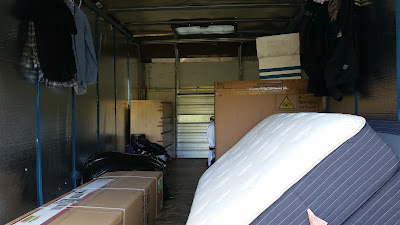
By rearranging my things (all three of them), I was able to clear up some space. Not that I actually used that space for anything, it just seemed like a good idea at the time. Though as time went on, my tidy arrangement kinda…fell apart. I shuffled stuff around to help people move, I threw things away, I loaded and unloaded everything to make room for repairs, and just generally accumulated some cruft along the way. If I were to draw the diagram again as of last week, it'd look like this:

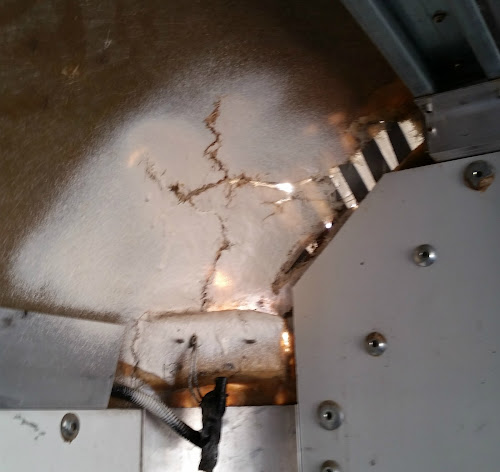
There's still some space, but it's certainly not optimal. Plus, that diagram isn't really telling the whole story. For one, Bed is in pretty rough shape. The springs have lost most of their will to spring, and the box-spring cloth is torn to shreds from being dragged back and forth across the truck half a bajillion times.

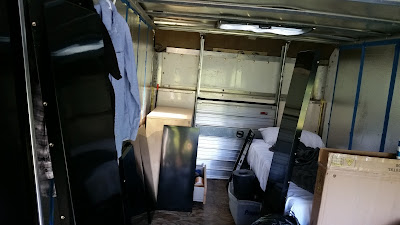
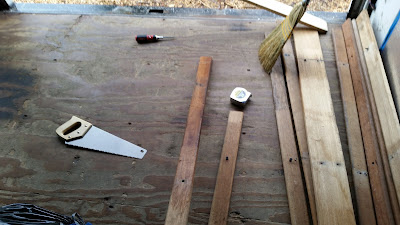
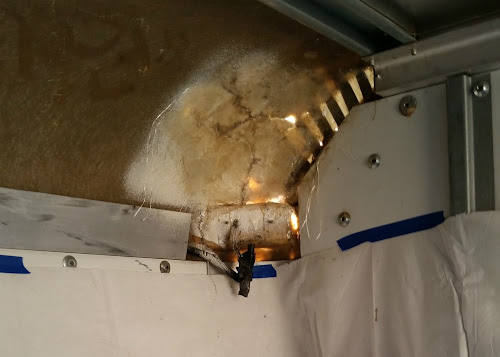
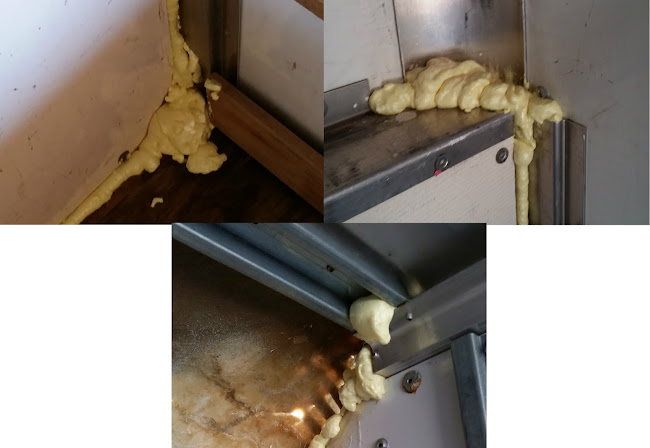
And Dresser…well Dresser has seen better days. Dresser took a tumble or two on some particularly tight turns, which ripped out my arts and crafts straps. Those straps, I might add, had already been shoddily replaced a few times. Adding insult to Dresser's mortal injury, previous water damage meant that I had to rip out most of the back paneling, making Dresser pretty wobbly. I had attempted to brace it with a spare 2x4, but even that was starting to give way.

Unsurprisingly, Ikea furniture was not meant for the trials and tribulations of truck life.

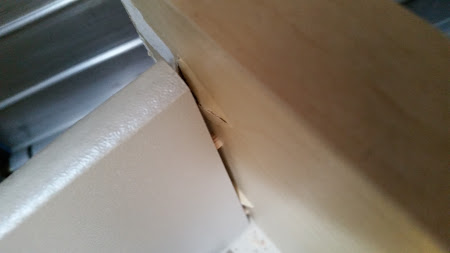
Dresser was coming apart at every possible seam. The last picture was taken mere minutes before Dresser met its timely death.

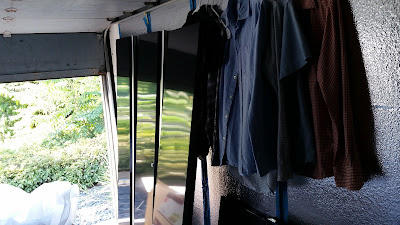
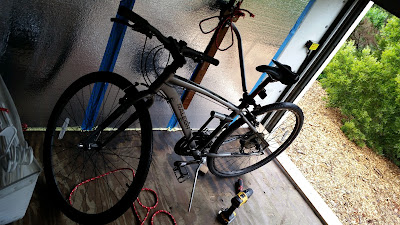
And the cherry on my sad truck sundae: the cruft and clutter. I had a big box full of Random Stuff™: bike parts, unsorted Christmas gifts, a Motorcycle helmet, cleaning supplies, a pile of insurance and stock documents, and god knows what else. And my shoes had clearly been wandering, evenly distributing themselves around the remaining space.

Even still, it's not really that bad. At the end of the day, it's still perfectly livable.*

I think at the heart of it, I just enjoy being organized. It's probably a control thing. If my home is organized and clean, I feel like I generally have my affairs in order. Conversely, when the truck looks like a bomb went off in a shared Home Depot/Goodwill dumpster, I feel unprepared.

It's also about keeping up some semblance of appearances. I'm living in a truck, I need to do something to make it look like I have my life together. It's why I try to wear halfway decent dress shirts to work, and (attempt to) maintain this blog. I can't live in a truck and have it look like a war zone. I made a helpful chart to illustrate my point:

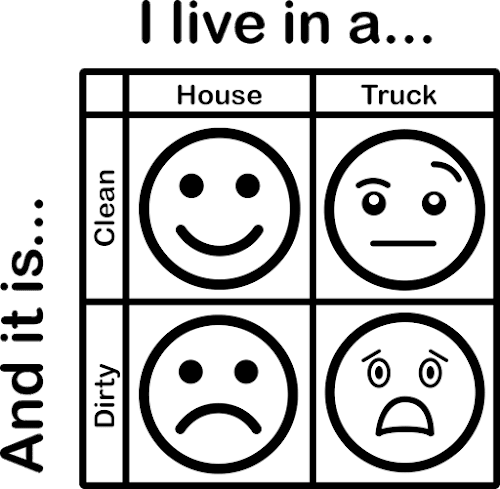
Given the irrefutable evidence of the above chart, it goes without saying that something had to change. So I formulated a plan, and last weekend, I threw away all two pieces of furniture I owned.

The Plan

  1. Buy things - I can't just throw away all my stuff and live in an empty truck. That's a bit hardcore for my tastes. I have to find suitable replacement things first. I tried to stick to my general purchasing strategy: Think about what I truly need, and then make a careful purchase of some high-quality, long-lasting items that satisfy those needs.
  2. Assemble things - If you want something done right, do it yourself. Plus, it's cheaper to buy things unassembled. And some pre-built things are harder to get delivered. And you usually learn some stuff in the assembly process.
  3. Throw out things - Complete the catharsis. Kick the old stuff to the curb. If it makes sense to donate it, do that instead.

Straight-forward enough. But, as always, the truck throws some interesting wrenches in the mix. Where do I get large things delivered? Where do I assemble these things? Do I have enough room for both the old things and the new things? How/Where do I even get rid of the old things? I started by buying things.

Buying Things

I went in with a clear idea of what I needed: a bed and a dresser. Nothing more, nothing less. I kept an eye open for ways to make better use of the limited space, and let that inform my purchases. I started with the bed. I knew I couldn't have a mattress professionally delivered to me, I don't have a "real" address, and I don't think they'd appreciate me giving them some random GPS coordinates corresponding to a parking lot somewhere in South Bay. So my options were either 1) shop online and have it delivered to my mailbox, or 2) pick one up in a store. Both options were fine, but after a bit of research it looks like you pay a pretty hefty markup for shopping at a brick and mortar store. Unless I wanted to spend several thousand extra dollars for fun, my choice was pretty much made for me.

I started researching and comparing online brands. I'm not going to link to them because I'm lazy, but I was looking at Purple, Casper, Tuft and Needle, Leesa, Amerisleep, and a few others. After a week of reading reviews and comparisons, I had narrowed it down to Casper and Leesa, based mainly on price and volatile organic compound (VOC) levels. Price is a pretty normal metric to use. As for VOCs, I figured the mattress would be in a much smaller area than the manufacturer intended, with less air circulation. I don't want to saturate my limited air supply with irritants and sadness. In the end though, it came down to which one was cheaper after all applicable discounts, and Leesa came in at a riveting $6 cheaper. Not much of a difference, but fine as a tie-breaker.

Historically, my feet always flirted with the edge of the bed, so I ordered a Twin XL to replace my Twin. This meant I couldn't really reuse my tattered box-spring, even if I wanted to. I found a tall mattress base that looked good, and had the added bonus of giving me some under-bed storage space. I picked up new sheets and a memory-foam pillow for completeness.

To avoid annoying my postmaster with a 4 foot tall, 50+ pound package lingering around his shipping center, I picked it up within an hour or so of it being dropped off (according to shipment tracking). I did the same thing with the mattress base and the barrage of other packages. If there's any one single person I want to stay on good terms with, it's the dude who has complete control over my address and mail situation.

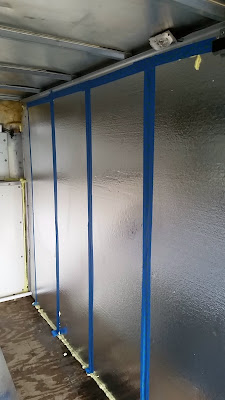
As for the dresser, I had failed pretty miserably with trying to make my own strap securements for the drawers, so I wanted something with a built-in locking mechanism. I guess I played it pretty fast and loose with my requirements, because I ended up getting a six-foot tall, welded steel garage storage unit, which I wouldn't really consider a "dresser".

28.5 ft3 of raw, storage-y goodness.

While unorthodox, this has a number of benefits over any dresser-based solution. For one, this thing is huge. Volume-wise, it's probably twice the size of the dresser I tossed out. That means I can fit all my clothes, and any remaining Random Stuff™ worth keeping. It's also made of steel, so it's more sturdy and durable than any wooden furniture I could have picked up. Even though I don't have any more water/leak problems, it's still nice to have something a bit more resilient to such things. Best of all, this thing locks, which means the doors won't be opening while I'm driving (provided I remember to lock it). It's also more secure, not that I'm worried about people stealing from me.**

Instead of having the 150+ pound unassembled cabinet shipped to me, I went to a local Home Depot to pick it up. Unluckily for me, the first Home Depot I went to didn't have it in stock, which was entirely my fault because I didn't check their handy online inventory system. Luckily for me, not only did the second Home Depot have them in stock, they had a display unit that I could look at beforehand to help figure out how I wanted to organize and store things.

Assembling Things

At this point, my truck has my old bed and box-spring, my new bed (in a box) my new bed frame (in a box), sheets, pillows, and an unassembled ginormous storage cabinet. It's getting pretty crowded in there. So right after I bought the cabinet, on a sweltering Saturday morning, I plunked the truck down in an unassuming, low-traffic part of the Home Depot parking lot and got to work.

I should note that, for better or worse, this isn't my first time assembling things in a Home Depot parking lot. I had done something similar for the Ikea dresser I was now replacing. Not that that makes it any less weird, but it ends up working out pretty well. For one, I'm always missing some tool or piece of hardware, but I never realize it until the assembly process is well underway. It's obscenely convenient to take a 30 second walk and go pick up the part I'm missing.

Case in point: I made nine independent trips into Home Depot that fateful day. The first one was when Home Depot that told me my storage unit was in another castle, but the other eight trips were picking up drill bits, repeatedly buying ill-fitting screws of different sizes, remembering I needed caulking, returning the drill bits I didn't need, buying plastic bins—you get the idea.

Assembling the bed was a breeze. Modern memory-foam mattresses come vacuum-sealed, setting them up is just unrolling them and gingerly evicerating the plastic casing. Bed frame assembly amounted to unfolding it and tightening four wing nuts.

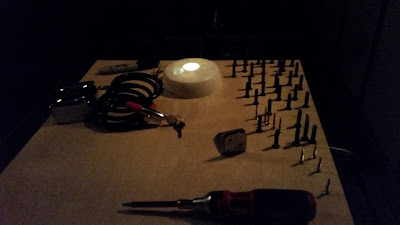
Assembling the storage cabinet was harder, but still straight-forward. It required ~80 screws, which I lovingly hand-tightened with a small, provided hex key before realizing the other doodad in the box was a hex insert drill bit that would have made my work 1,000x more efficient. Such is life.

Throwing Things Out

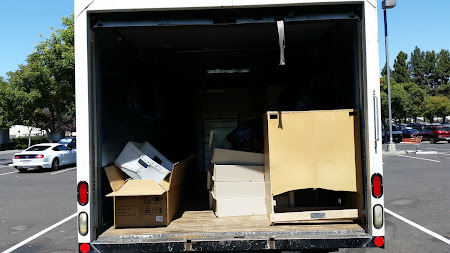
Post-assembly, the truck was in far and away the most disheveled state it has ever been in. Sure, I had a bunch of shiny new furniture, but I also had all of my old furniture, plus a small mountain of garbage packing materials. On top of that, I had gone through all of my Random Stuff™ and tossed out everything I didn't need, like old building supplies, unnecessary documents, and parts of my now-defunct bike rack.

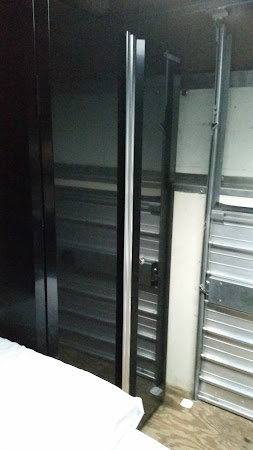
The truck was looking extra chaotic during (and after) assembly. At one point, large steel panels covered pretty much every available surface.

Which leads me to my previously posed question, where do I put all this trash? Conveniently, there's a public landfill in Santa Clara. It also happens to be a stone's throw from Home Depot…just not the Home Depot I had been assembling things at. Anyway, this landfill has a bunch of different rates depending on what you're dumping and whether or not you're a resident. Since my mailbox is in Santa Clara and that's what's on my license, I get the discounted 'resident' rate. I feel morally ambiguous about this, but not enough to actually stop me from continuing to use it.

The way the process works, they weigh your truck on the way in, and they weigh it on the way out. You're charged based on the difference, at a "general rubbish" rate of ~$20/yd3 for "residents", which usually means I pay like $10 to toss all my junk. Those units are kind of strange though. Cubic yards? That's a measure of volume, but they're charging based on truck weight, which means that they must have some idea of "average garbage density." I haven't the slightest idea what that would be, but I also don't care enough to try and calculate it from my receipt.

Tragically, I didn't get my rate of $20/yd3 though. This time, when I showed up, they asked me to open the back, which was definitely a first for me. The garbage was obscuring most of my actual living setup, so it probably wasn't immediately obvious that I live in there. Not that they would have cared, but I was there to clean out my closet, not to explain the skeletons in there. The only comment they had was that the two mattresses (old mattress and old box-spring) would cost $50 a piece to toss, which is at least 20x the normal rate for their weight. Not sure why this is the case, some sort of premium for not trying to sell them on Craigslist or something? Who knows. I paid my $108 and was on my way.

Good as New

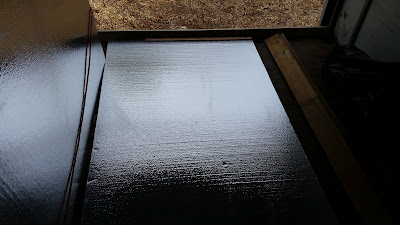
When I got back to my usual stomping grounds, I did a quick sweep and tied up some loose ends, like finishing up some organizational matters and securing the cabinet to the wall. The black finish is so darn reflective it's hard to get a good picture:

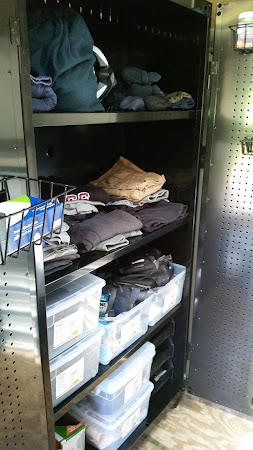
Everything I own either fits in the cabinet or, for some of the larger things, under my bed.

Tallying up the cost of this home improvement project:

  • Sheets and Pillows: $79.54
  • Bed frame: $84.99
  • Garbage disposal: $108
  • Cabinet and accessories: $412
  • Memory-foam Mattress: $583
  • Not living in a disorganized truck dumpster: Priceless

*Naturally, this will depend on your definition of livable. The truck still doesn't have plumbing or electricity or anything normal like that.

**I'm always saying that if someone robbed the truck, they'd basically just be cleaning for me.

Source: My new sunroof (flanked by my new insulation)…in all its weird, truckly glory.

Truthfully, I've been doing a pretty awful job at keeping you guys updated with what I'm actually doing, truckwise. The last time I even showed off the interior in all its shanty glory was almost a year ago. In the intervening interval since my last Home Improvement update, I've completed a few fairly large truck projects. By "large", I don't mean anything that requires any real technical competence, but certainly larger than fixing the hole or doing arts and crafts.

Insulation

Hold up, didn't you spend a whole post talking about how you didn't need to insulate the truck? What gives?

Okay okay, you caught me. I know I said it didn't make sense to insulate the truck, because it wouldn't be effective and I can just bundle up when I need to, but curiosity got the better of me after the idea was planted in my head. You might remember that I fixed the hole in the truck after receiving wonderfully detailed instructions by a pseudonymous Nancy (still from PK Safety). Well, as it turns out, Nancy also had some well-formulated ideas on how I could insulate the truck. After a modest amount of research, I decided, "What the hell, let's give it a go," and on nothing more than a whim, I started tearing apart the walls.

The wood slats I pulled off the walls, and some of the screws I had to coerce out to get the slats off.

The next step was to line the walls with insulation — Nancy suggested 3/4" rigid EPS foam sheathing. From there, the process is measure, cut, foam seal around the edges, and tape into place. Given that I had to cut about seven 2' x 7' rectangles for each of the two sides, it should have taken a few hours if I was even remotely competent with this type of stuff. But no, instead of a casual few hours of finagling the new fixtures into place, installing insulation became a four month, on-again-off-again affair that kept my truck looking like a war zone for the duration.

How could this have possibly taken you four months?

Naturally, it wasn't four months of constant work, I was only working on it on weekends for the most part, and even then, some weekends I couldn't convince myself I wanted to work on it for more than half an hour or so. The biggest deterrent/problem I encountered was a lack of space. While I have way more than enough (arguably too much) space for simply living and existing, that ceases to be true when I'm trying to cut 4' by 8' sheets of insulation and move around my bed and dresser to access different parts of the wall. So I had to work in sections, e.g. move everything to the back right corner to work on the front left. It basically felt like a giant game of this:

I spent several months playing a life-size version of Unblock Me.

How much space an individual panel takes up when I lay it down to cut it. You'll notice there isn't a ton of room left to maneuver.

Another hysterical complication (which the borderline-prophetic Nancy had warned me about), is that every time you cut into these foam panels with a switchblade, you leave a trail of little styrofoam beads in its wake. So with each and every slice, all ~46 of them, the truck would essentially become a giant snow globe, and even the gentlest of breezes would spin a snowstorm into existence. Not wanting to litter the outside world with these onslaughts of artificial dandruff, I put a plank of wood across the entrance and swept the tiny nuisances away into a trash bag after every few cuts.

What it felt like being in the truck for those four months. I was basically Homeless Snow White™*.

The Final Result

When all was said and done, it didn't look all that bad. I mean sure, it looks like I live in a hobo's spaceship with the shiny tinfoil coating, but at this point we're all painfully aware of how little I care about aesthetics.

I'm intentionally only showing you the right wall, because I did the left wall first and it looks significantly more shoddy. Also, notice the far more appropriate/less disastrous usage of "Great Stuff" expanding foam this time around.

I haven't actually noticed if the truck retains heat any better (or worse) since adding the insulation, it hasn't been cold (or hot) enough to tell. In any case, it was certainly a learning experience, and a great exercise in what I can do with the truck if I'm feeling particularly bored inspired.

Skylight!

Yeah yeah, I know it's technically called a "sunroof", but this is my home and I'll call it whatever I gosh-darn/damn-well please. Anyway, way back when I first got the truck, I mentioned the possibility of getting a skylight. Cutting gaping holes in the truck is well-outside my truck-modification comfort zone though, so I opted to bring in the professionals over at Happy Vans, who did the wonderful job pictured at the top. I've noticed far better air circulation/ventilation over the past few weeks, and it's nice waking up to a truck-full of sunshine on the weekends. The eventual goal is to cut a door between the cab and the back, so that I can actually lock the rear gate at night instead of keeping it cracked open and "locked" with vice grips. Happy Vans will probably be the ones doing that particular project as well.

The only modification I made was attaching some metal screen door mesh with a few neodymium magnets, to keep pests out.

Bike Rack (Redux)

This post is already long enough, and I've already spoken on what goes into building a truck-bike-rack, so here's a not-so-pretty picture of the reassembled bike rack:

Also pictured: the power drill that I bought after getting tired of driving screws into sheet metal and various other obstinate materials with a screwdriver.

*Or Elsa, if you're more about that Frozen life.

Source: My arsenal of Home Depot supplies used to wage war against certain truck deficiencies.

It's been long enough.

I took my sweet time getting around to actually doing it, and then almost another month on top of that to start writing this post about it, but we're here now.* And that's what really matters, right?

So anyway, you might remember "The Hole" from that time that birds always insisted on pecking at it, or that other time that I MacGyver'd a drainage solution to avoid waking up in a truck-shaped rainwater swimming pool. Looking back, I had every intention of paying another human being money to fix this particular problem. That all changed once I received an email from Nancy (over at PK Safety), who, like BoscoBob before her, knows way more about fixing my problems than I do.

Nancy was kind enough to give me step-by-step directions on how to apply a sturdy smattering of fiberglass mat/resin to the tragically maligned hole, directions she curated and perfected from her experience fixing/consistently-being-in-close-proximity-to boats. "If this treatment is good enough for boats, which have to withstand waves and constant interaction with salt water," I thought to myself in a conveniently blog post-ready format, "it's sure as hell good enough for protecting my truck from a few gentle raindrops."

The Plan

As you can see from the picture above, this wasn't a small undertaking. Quite the opposite, this was hands down the largest truck improvement project I've attempted thus far. And as a person who's never considered themselves "handy", "useful with tools", "remotely adroit at anything that requires common sense", or "likely to survive attempted usage of industrial chemicals", this was sure to be a demanding (and educational) experience. With Nancy's instructions in hand, I biked off to, you guessed it, Home Depot, a company so integral to my truckly lifestyle that I should probably double down and buy stock in it. On my short list of things to buy:

  • Acetone. As it turns out, acetone is useful for more than just pyromaniac teenagers (guilty) and removing nail polish. It does a solid job of cleaning/preparing surfaces before putting other chemicals on them. It was especially useful for my needs because there were clearly failed attempts by previous owners to fix The Hole, as was evident from the strange rubbery white residue surrounding it, which I'm guessing is Flex Seal.
  • Face masks. Preferably get the type that save you from losing a couple IQ points to the chemical cocktail you're about to whip up.
  • Drop Cloth. Because I've never been particularly capable of coloring inside the lines, and I don't have a burning desire to cover my walls and floor in a nearly-impossible-to-remove epoxy.
  • Great Stuff® - Window & Door Sealant. To completely misuse and make the walls look like they're giving birth to some cross between Alien and the Stay Puft dude. Check out the picture below to see just how I thoroughly I screwed up. Note: It is literally called Great Stuff®, my opinion isn't quite as enthusiastic.
  • Fiberglass resin. To go with the Fiberglass hardener.
  • Fiberglass hardener. To go with the Fiberglass resin.
  • Fiberglass cloth. If the resin and hardener are the marshmallows and chocolate in a bad food analogy, the cloth is the graham crackers that hold the whole sticky metaphoric S'more situation together.
  • Painter's tape. I think the intended purpose is to mark off the area you're working on, but I completely skipped that step.
  • Empty, clean Chobani® Greek yogurt cups. For mixing epoxy. I used the low fat plain-flavored variety, but I've heard that strawberry works well too.
  • Paint brushes. For gooping up and dabbing the epoxy onto the fiberglass cloth.
  • Several types of gloves. Because while super-gluing your fingers together is undoubtedly unpleasant, I imagine epoxying your fingers together is at least two circles of Hell deeper.
  • Water. Stay hydrated out there, kids.

Nancy's list of Hole-fixing ingredients also included things like "sand paper" and "primer" and "rollers", which I dutifully ignored because it looked like their collective purpose was to make everything look prim and proper, which isn't of any particular interest to the dude who lives in a borderline leprotic van still covered in several-year-old graffiti.

Getting It Done

I had everything I needed to do this thing, I just had to put the rubber to the (literal?) road. I woke up early on a beautiful and crisp Saturday morning, drove to a nice remote area, and threw open the back gate, both for ventilation and sunlight.

The view from my work site.

The first step was to survey the area and plan out how I was going to handle it. There was a chunk of fiberglass missing on the right edge, and there were a bunch of cracks that extended about a foot beyond that. I had bought more than enough to do the whole area over, so I put some acetone on a paper towel and cleaned down everything extending a few inches beyond the cracks. The idea is that the acetone removes anything that would prevent a good bond from forming.

Yup, definitely a hole.

One last piece of setup: I tossed the disposable drop cloth out below the soon-to-be affected area, and taped it to the wall with the painter's tape. Before whipping out the rest of my meth lab essentials, I threw on a pair of gloves and one of the face masks.

Casting sideward glances to intimidate and confuse The Hole is also a recommended, but optional, step. *insert a good Bane impression here*

Anything more than very basic instructions leave me befuddled and deterred, so I was grateful that the fiberglass resin and hardener had simple ratios to mix together: a certain number of drops of hardener per cup of resin. The trick is that you only have 10-15 minutes of time to spread the mixture once you mix them, then they harden up and become a sad unusable cement. That's why I had been binging on Chobanis®, I needed multiple cups for multiple small batches. So I poured a small quantity of the molasses-like resin into my plastic measuring cup, and then counted out the corresponding number of hardener drops into one of my re-purposed yogurt cups. After pouring the two components into the same container, I frantically looked around for the stirring sticks I had completely forgotten to purchase. Luckily, the wood chips on the ground just outside the truck made for great improvised stirring sticks. From there, it was just a matter of painting a thin layer of epoxy, ripping a piece of fiberglass cloth off, dabbing it all down with a little more epoxy, and then repeating the whole process again, layer after layer. I put down around 20 pieces of the fiberglass cloth in total over the course of my three batches of epoxy, with each piece roughly half the size of a sheet of paper.

The end result (before drying). It doesn't actually look any better in this picture, but I can assure you that it's all one solid piece now.

To finish up, I threw all the leftover, unsalvageable, half-used ingredients onto the drop cloth, which I then rolled into a little ball and tossed into a giant garbage container belonging to a nearby construction site. I then left the truck-patch to cure (and vent some of the brain-cell-killing chemicals away) for the rest of the day, opting to go on a nice long bike ride and coding from a cafe a few towns over.

Is It Holding Up?

If you go back and look at my first two Home Improvement projects, you'll see that I did a terrifically shoddy job on them and had to immediately turn around and repair them. Luckily, that doesn't seem to be the case this time around. Nancy's instructions worked wonderfully, and the bond still appears sturdy as ever. One pretty big issue is that I didn't totally fix my leaking problem. I still have a pretty consistent drip from the metal area to the top right of where The Hole was, and I have to do a bit more research as to where it's coming from before El Niño turns my truck terrarium into an aquatic abode.

The Great "Great Stuff®" Unprovement Project

The idea behind Great Stuff® is pretty simple. You shake the can, you spray it into the cracks, it expands a bit, and it provides a little extra insulation. I thought this would be a great addition to the area around The (now defunct) Hole, and just the back of the truck in general, which is a bit drafty. But I forgot to take into account how bad my basic motor skills are, and how much the stuff expands, and I kind of just coated seemingly random bits of the truck in it. It legitimately looks like Shrek had a vicious cold and was sneezing huge mucus-y webs of lumpy sadness everywhere.

A collage of my ceaseless stupidity.

The icing on the cake is that the only way to remove the stuff, per the instructions, is "mechanically". Meaning I have to physically rip this stuff free from everything that I've attached it to if I want to redo it properly, which I'd like to do at some point. Like I said before, if nothing else, this project was very, very educational. And while I don't know when any of this information will ever come in handy again, it's certainly helping me towards (wrongly?) believing I can undertake larger and more ambitious projects in the future and maybe have them not fail entirely/spectacularly. I guess we'll see.

*I was really waiting until I had finished adding the functionality to put multiple pictures in a post, which as you can tell, totally exists now.

Desiccant.

I really enjoy the way that word sounds. It's like a discount version of decadent, except that it hasn't been soiled by rampant overuse in chocolate commercials. I was curious as to its etymology which, as you'll see above, isn't nearly as exciting as I'd hoped. I had never even heard of the word until a reader, known only to me as "BoscoBob", brought it up in an email.

Bob

Let me tell you a little bit about Bob (which he will henceforth be called for brevity), not that I know much about him anyway. Bob also spent quite a bit of time living in a vehicle, five times as much as I have as of this writing in fact. In my eyes, this makes Bob a Wise Truck Elder™. So when Bob came to me with advice, I took notes. Diligent notes.* His advice was this: it's going to get cold out, and human beings do a lot of breathing and sweating. If you can't control that moisture, every eligible surface in the truck will be covered in mold, which is undoubtedly going to make you an unhappy camper.

Luckily for me, as Bob noted, there exists a magical technology that requires neither fire nor electricity to operate, and yet its mere presence can suck the moisture clear out of the air and trap it within, like a genie in a lamp. Bob was talking about desiccants.

The Prophecy

And sure enough, Wise Truck Elder Bob was right. As we creep further and further into Fall, unwaveringly towards Winter, I've found that my mornings are becoming increasingly…moist. Every non-porous surface: ceilings, walls, and even my phone** and battery pack, are uniformly damp, almost like the morning dew on a grassy field. Except this field is me and everything I own. It's gross to think of it as though everything is coated in my own sweat and breath though, it's more like when your windshield fogs up on a cold day. The air in the truck is warmer (because of me) and more moist (yes, also because of me), and this warm, moist air meets up with the cold metal of the truck and subsequently condenses. I mean I'm not a meteorologist or anything, but that's my understanding of it.

So I did what any self-respecting truck person who doesn't like bathing in their own breath would do, and I went to Home Depot, where they sell industrial-sized tubs of this stuff:

DampRid®, which I can only assume is concentrated cat litter

I got a 64 oz tub, which is supposed to be enough for a space far larger than my 128 ft2 truck, but I like to live by the credo "Better Safe Than Sorry" when it's convenient to me. The process for getting it setup was pretty complicated though, and took longer than I'd have liked. I'll painstakingly detail the steps out here, but be warned, it's a pretty arduous process and I wouldn't recommend someone begins it unless they have a substantial amount of time on their hands to see it through:

  1. Take off the lid.

Yeah okay I lied, that's all you have to do. Seems suspiciously simple, I know, but it definitely did fulfill its end of the bargain. The area around my bed was much drier the morning after opening it; my phone and battery pack weren't in any danger of short-circuiting either. The tub of re-branded cat litter DampRid® says it'll last six months, which isn't bad at all for a $10 investment. I suspect it'll have a shorter shelf life because the truck isn't an entirely closed system, but I'll need a bit of empirical evidence before I can say for sure. In the mean time, I'll enjoy being left high and dry thanks to the definitely excellent existence of the desiccant.

*I didn't actually take any notes. This was an email, after all.

**My phone is waterproof, so this isn't as concerning as one would thing. Still definitely not ideal though, thus the desiccants.

Source: My secret weapon in the War on Terror Insects, courtesy of Home Depot

Gnat nightmares, spider sadness, moth madness, ant anxiety, bug barrage—ok I'll stop now.

I'm not a fan of bugs. Generally speaking, unless you're an entomologist or earthy-crunchy type, you probably aren't either. I'm not terrified of them by any means, I'm not liable to stop what I'm doing if a bug decides to drop by and say hey, but I'm still likely to exterminate them all with extreme prejudice before going to sleep. After all, nobody is trying to eat spiders whilst slumbering. I'm happy to say that I haven't had any full-blown infestations recently, though it hasn't always been the case.

Before I recount in gritty detail the various hordes who've ravaged my home, I should note that the box makes a fantastic breeding ground for all of my nightmares. It's warm, dark, and humid during the day, and I keep the back gate slightly open at night for air circulation and temperature control, so it's even easily accessible for them. On top of that, despite not keeping any food in there, there are more than enough yummy goodies (from an insect's perspective) in the form of cloth, wood, and the various clumps of refuse hiding in cracks and crevices left behind by previous truckers. Basically, I'd been inadvertently building a 128 ft2 insect farm and microbiome from the start.

Moths

Moths were the first plague I encountered. I'm not sure what drew them in initially, but I started noticing them a few days after I "moved in". As it turns out, moths feed on fabric, particularly wool and silk, which I apparently have in my wardrobe (who would have thought). For about a week, it was a pretty common occurrence to have 3 or 4 flying around when I came back, and it really bothered me when they'd fly out of my gym bag at work, or I'd find them dead at the bottom of the dryer (I'm currently shuddering thinking about the latter two). I think the issue is mainly that my clothes (on a rack) are too easily accessible, clothes left in the attic of a normal home have similar issues. Anyway, I went on a pretty intense extermination spree, shaking out all my clothes and washing my entire wardrobe, and that seemed to do the trick. Now I periodically beat all my clothes with a broomstick, like a normal, well-adjusted human being. And when I'm packing the next-day's clothes into my gym bag, I always shake them out first to double check. I still have the odd run-in with moths, but now it's more like one per week, which is, in my opinion, very manageable.

Spiders

If you had never seen a spider before, and nobody had explained to you that spiders existed, it'd be very reasonable to believe that they were straight up malicious alien lifeforms. They're hairy, have legs coming out radially all over the place, have crazy eyes, and they make these intricate webs exclusively for trapping (and subsequently eating alive) prey and pissing people off. They're weird and scary, and in the harsh lighting of my truck, they cast massive, nightmarish shadows, regardless of their actual size. On top of that, their presence normally means there are other pests for them to feed on, so their very existence spells trouble. For all these reasons, I have quite the preoccupation with keeping them away from me. I've never found more than one or two at a time, but I'm much more comfortable when there are zero of them. Controlling them normally means controlling whatever else has inhabited the box first, then killing all the leftover spiders by hunting them down one by one. Finding all their sneaky hiding spots can be tricky, but it's not that bad when your entire house is one room.

Ants

My ant infestation was by far the worst experience I had. Originally, I noticed a few small, translucent insects crawling over the wood securement I use to hold the bed in place. No big deal I thought, I'll just move the wood to near the door and brush them off outside with the broom. But when I moved the wood, I saw that there were a ton more of them, and it wasn't the wood that they were after. In fact, hordes of them were moving back and forth from a shadowed corner of the truck. This is essentially what nightmares are made of, an uncountable number of entities moving in the shadows. I immediately moved my bed to the other side of the truck, and hesitantly shined a flashlight into the shadowy corner. It was as awful as I could have imagined. I was greeted by an army of tiny, determined ants, pouring endlessly out of a small crack in the wall. I spent the next two hours sweeping them out of the truck, neurotically checking and scrubbing every corner of the truck. Once I felt I had it under control, I went to sleep, only to be haunted by wave after wave of insect-related nightmares. As you can imagine, the next day saw a hasty trip to none other than Home Depot.

The tricky thing about killing insects in the truck is that you can't outright spray them with chemicals or put mothballs everywhere: it's a small, enclosed, poorly-ventilated area, and spraying a pesticide cocktail in the place where I sleep is pretty much a guarantee that my kids will be born with the wrong number of eyes and limbs. Luckily, I found these perfectly-evil ant traps, which work by being delicious to ants, and then killing them after they've already fed the entire colony. I dropped one of those bad boys near the aforementioned crack of despair, and then didn't look at it for two days. When I went to check in, the transparent plastic container was filled with the stationary bodies of my enemies, which brought me a palpable sense of relief (and joy?). I threw that trap out, and put another one down. At present, that second trap has been down for three weeks, and I haven't seen a single ant in or around the truck since. Powerful stuff.

My first two Home Improvement Projects weren't exactly the highest caliber works of craftsmanship. For example, putting more than two or three articles of clothing on the clothes rack caused it to bend, shake, and warp, and the rope around the bed came undone approximately once a day. So my third Home Improvement Project was setting right what I had previously done so, so wrongly. And it's the weekend, which means that after my workout and shower, the sky was the limit as far as errand-running was concerned.

Back to Home Depot

Home Depot is a recurring theme/location of these posts, and I'd be pretty lost without it. I recently found out that Home Depot will cut 2x4s for you to whatever length you want, which I thought was pretty sweet because it means that I don't have to buy a circular saw. So I used my handy dandy tape measure (also previously purchased at Home Depot), and took a few measurements.

Reinforced Clothes Rack

I cut some 2x4s to be the length of the gap between the pre-installed wooden railings. Learning from my mistakes, I purchased some wood screws this time around, which made the whole process far less painful. I measured out the distance between the 2x4s, again learning from my previous errors. Then I re-secured the hanger mounts and screwed everything back down. The end result is pictured above, this time with a fully loaded rack of clothes, including my heavy jackets and sweatshirts. I have much more faith in this refined, sturdier clothes rack, and I'm starting to get comfortable with do-it-yourself projects.

Bed "Frame"

So I didn't quite build a bed frame per se, but I did cut a 2x4 to the width of the box, and then secure it with some angle brackets. This will keep the box spring in place, and I doubt the mattress would be able to overcome the static friction keeping it on top of the box spring. In other words, I ditched the rope, and I'm pretty confident this will work just as well, without the inconvenience of a having a length of rope running through the middle of the box.

What Next?

The box is starting to come together! My next project is going to be some carpeting, a little bit for aesthetics, but mainly for noise reduction and for keeping things from moving around. I also purchased a dresser from Ikea, but I'm only half way through putting that beast together, and it will definitely get its own post when it's done.

With the bed out of the way, I was ready to try bigger and better things. The next thing on my list was a place to hang my dress shirts and pants. In a real-world setting, this would be called a "clothes rack". So I took another trip down to Home Depot, which is quickly becoming the most important place in my life, and I picked up some screws, a screwdriver, some clothes hangers, two mounting brackets, and a 6 foot long wooden rod. If I had done everything correctly, here is how the process should have gone:

  1. Screw in mounting brackets, approximately 6 feet apart.
  2. Place wooden rod on brackets, screw into place.
  3. Place hangers on wooden rod.

So right off the bat, I realized I bought the wrong screws. How did I realize this, you ask? Well for one, they were clearly marked "Sheet Metal Screws", and I was working with wood. I quickly learned that the difference between the two is the threading, which is far more dense on sheet metal screws and makes it really hard to put them in, especially without a drill. So after 15 minutes of painfully torquing one of these screws into the wooden railings of the box truck, I was sufficiently satisfied with how far into the wall it was. I put the mounting bracket on over it, tightened it a few more turns, and moved onto the next one.

That doesn't sound all that bad, right? Well that's because I haven't adequately set the scene for you. It's a beautiful, sunny 75 degree day in Santa Clara, and I'm in the back of a nearly ventilated box truck, trying with all my might to fit square pegs (sheet metal screws) into round holes (wood). So anyway, I exhaustingly put up the second mounting bracket (without measuring because that would be reasonable and take all of the fun out of it), only to find out that I've placed the two mounting brackets 6 feet and 1 inch apart, meaning that the wooden rod for hanging the clothes won't rest on the brackets. Tragic. Repeat the bracket mounting process, but now 6 inches over.

Throw in a couple extra screws, because a little over-engineering can't hurt, and the end result is pictured above. How well will it work? Who knows! Only time will tell, but in the mean time, I'm fairly pleased, and ready to take on some even more ambitious home improvement projects as I refine my newly-pioneered form of crazy.

Source: Home Depot

When you move into a new home, a trip or two to Home Depot isn't just likely, it's inevitable. Turns out that holds true even when your new home is a box truck. Below, I've detailed the unfocused and wide-ranging list of items I found myself purchasing.

  • Graffiti Remover. I didn't quite find the truck in the most perfect condition. One tire was gouged pretty badly and the left side had been tagged up pretty good. The tire is all fixed, and the graffiti remover is surprisingly effective, but I've got a lot of area to clean - by my measure about 37 ft2. A couple more trips to an empty parking lot to clean it and I should be all set.
  • Work Gloves. To keep my hands from being coated in graffiti remover.
  • Step Ladder. To reach the top of the graffiti, though I actually haven't needed it yet.
  • Rags. To wipe off and mop up the graffiti.
  • Hornet Killer. Another pleasant feature of the truck, small hornet nests in both door crevices. Haven't gotten around to taking care of this yet, mainly because hornets are terrifying. They're like bees, but less fuzzy, more menacing, and can sting you until they're completely sure you're miserable.
  • Rope. Until I start building/buying legitimate mounting equipment, I need a way to make sure big things (like the bed) don't move around too much while I'm driving. I don't want a few sharp turns or hard brakes to mean rearranging the furniture. I'll post pictures eventually, but basically I tied sliding knots around the rails on either side of the truck.
  • Switchblade. To cut the rope, and just generally handy.
  • Broom. To sweep up the dust and trash that was in the back. I like to keep my truck dungeon clean.
  • Trash Bags. To dispose of the dungeon dust and trash, though I actually need to find a waste disposal place in the area.
  • Padlock. To lock up the back when I'm not "home".
  • Tape Measure. Generally useful, mainly for figuring out placement of shelves and furniture in the future.
  • Battery Lamp. The truck actually has some built-in lights in the back, but I got an extra one for good measure.

The only reasonable theme to glean here is that I'm a serial killer. Between the rope, trash bags, switchblade, gloves, and padlock, I'm surprised Home Depot didn't call the FBI as soon as I made it to the checkout area.


Subscribe

If you want to get emailed when I write a post, add your email here. Don't worry, you can always unsubscribe.